Time spent searching for a licensed HVAC technician: 8 months
Companies called: 23
First quote: $4,850
Frustration at our attempts to save money: Priceless?
Despite the fact that we did most of the work ourselves – and, if we’re being honest, because of it – no HVAC company would touch us. We did the research, installed the ERV system, purchased and installed the mini-split systems, and put in all the ducting. All we wanted was someone willing to confirm that everything was configured correctly, pull a permit, and pressurize the system. Probably no more than a few hours work. And yet, most places we called refused to even consider it. The only quote we got in the first six months was for nearly $5k… just to pull a permit.
In desperation, John even offered to rip out all of the work he had already done in order to let them do it themselves (and charge us for it). Even then, they said no because we had already purchased the equipment, and that’s where they make a lot of their money. Eventually we resorted to Craigslist ads, under the assumption that these would be people more desperate for work. The guy who eventually did help us out was so impressed with the insulation work I had done that he offered me a $10/hour job (needless to say, I decided to stick with engineering).
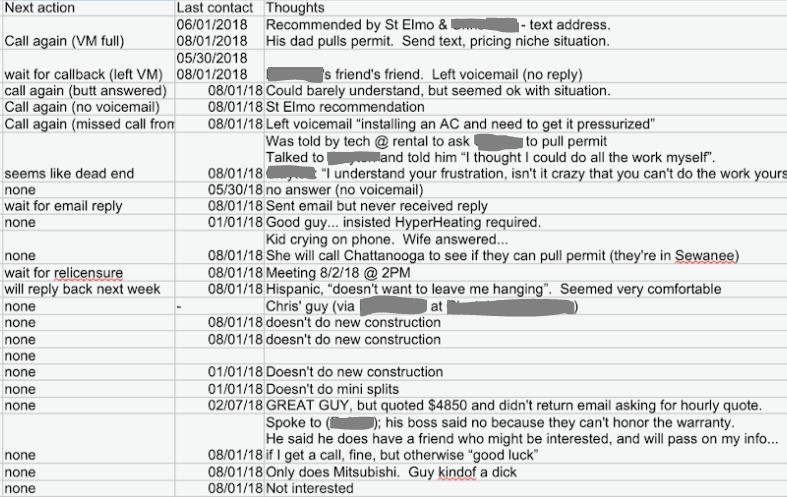
A subset of the document John used to track his calls to various companies. I got rid of any names for the sake of anonymity.
Again, we went over the top in choosing our system, largely due to our incredibly inefficient rental home that varies by about 10 degrees per floor and requires multiple dehumidifiers to be running at all times.
ERV (Energy Recovery Ventilator): This is the process of exchanging the stale air contained in a building with fresh, outdoor air. During the warmer seasons, the system pre-cools and dehumidifies while humidifying and pre-heating in the cooler seasons. It improves indoor air quality, reduces energy consumption, and allows smaller heating and air conditioning systems to be installed. My dad ran hundreds of simulations with varying levels and types of insulation before we ever even broke ground. He concluded that dollar for dollar, no other single component was as important from an energy savings standpoint.
Mini Splits: Mini-splits are heating and cooling systems that allow you to control the temperature and humidity in individual rooms or spaces. Each room has it’s own thermostat and remote control, and can be configured accordingly. When most people think of mini-splits, they think of the gaudy wall mounted monstrosities you usually see in hotel rooms. While we do have one of those in the garage, the rest are recessed in the ceiling (two are cassettes, two are ducted).
SEER (Seasonal energy efficiency ratio): The SEER rating for a unit is the cooling output divided by the total electric energy input. The higher the SEER rating, the more efficient the system. For example, upgrading from SEER 9 to SEER 13 would reduce power consumption by 30%. Modern air conditioners have SEER values ranging from 13 to the low 20s. Our high SEER rating of 21.4 – combined with all the exterior insulation we did – means our system is so efficient that both units combined will pull about 1/6th of the power of our hot water heater.
After all the challenges we faced getting someone to pull a permit, the city’s inspection ending up being the smoothest. The inspector was incredibly knowledgeable about mini-split systems and passed us with no concerns. It was the final inspection we needed before we could begin insulating the walls and putting up drywall. Full speed ahead!
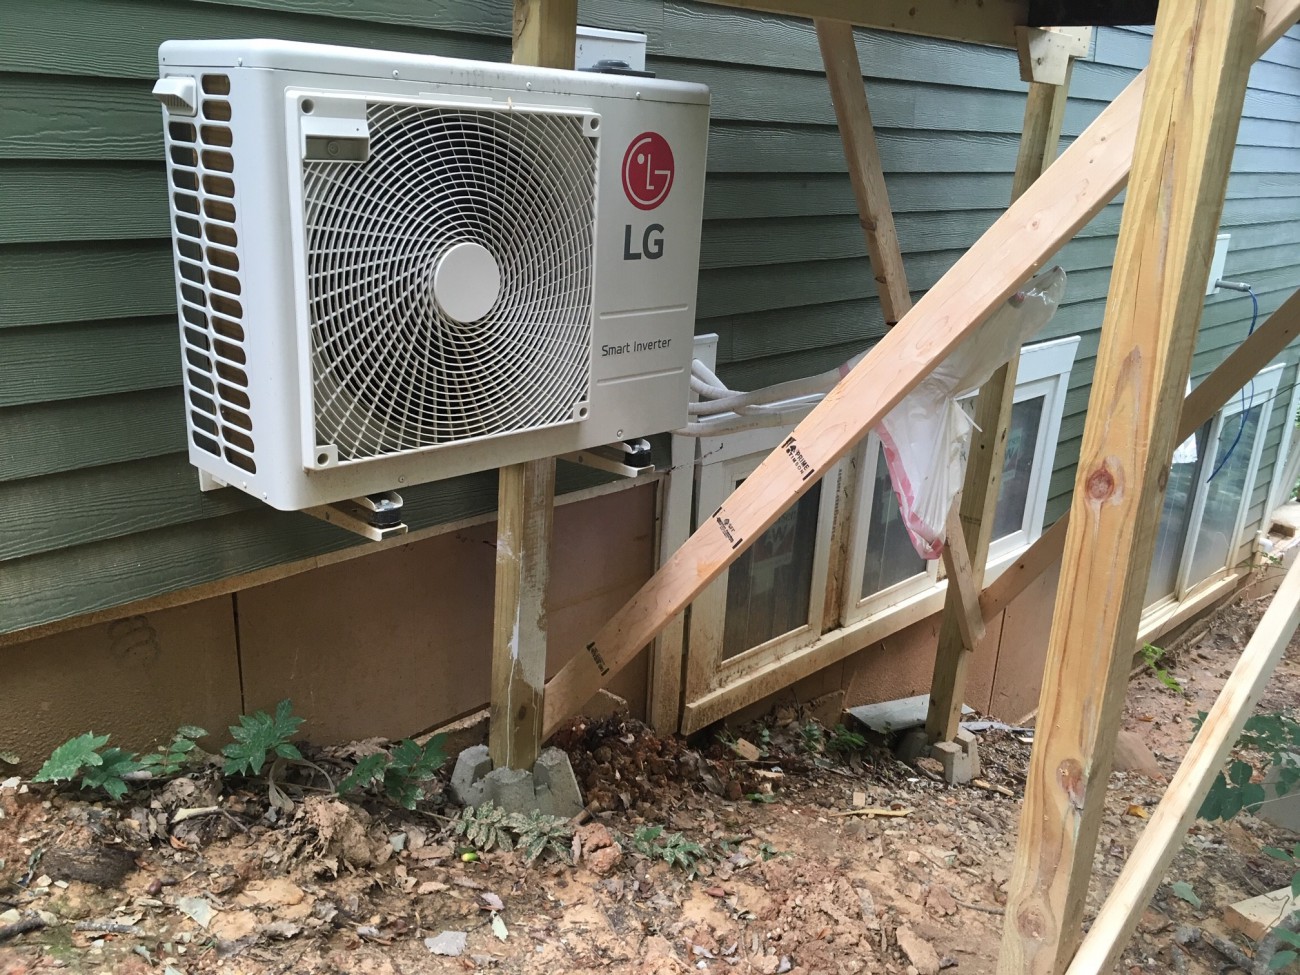
A view of one of our outdoor compressors. We were initially planning to purchase Mitsubishi systems, but discovered that the same specs from LG models were 40% cheaper.
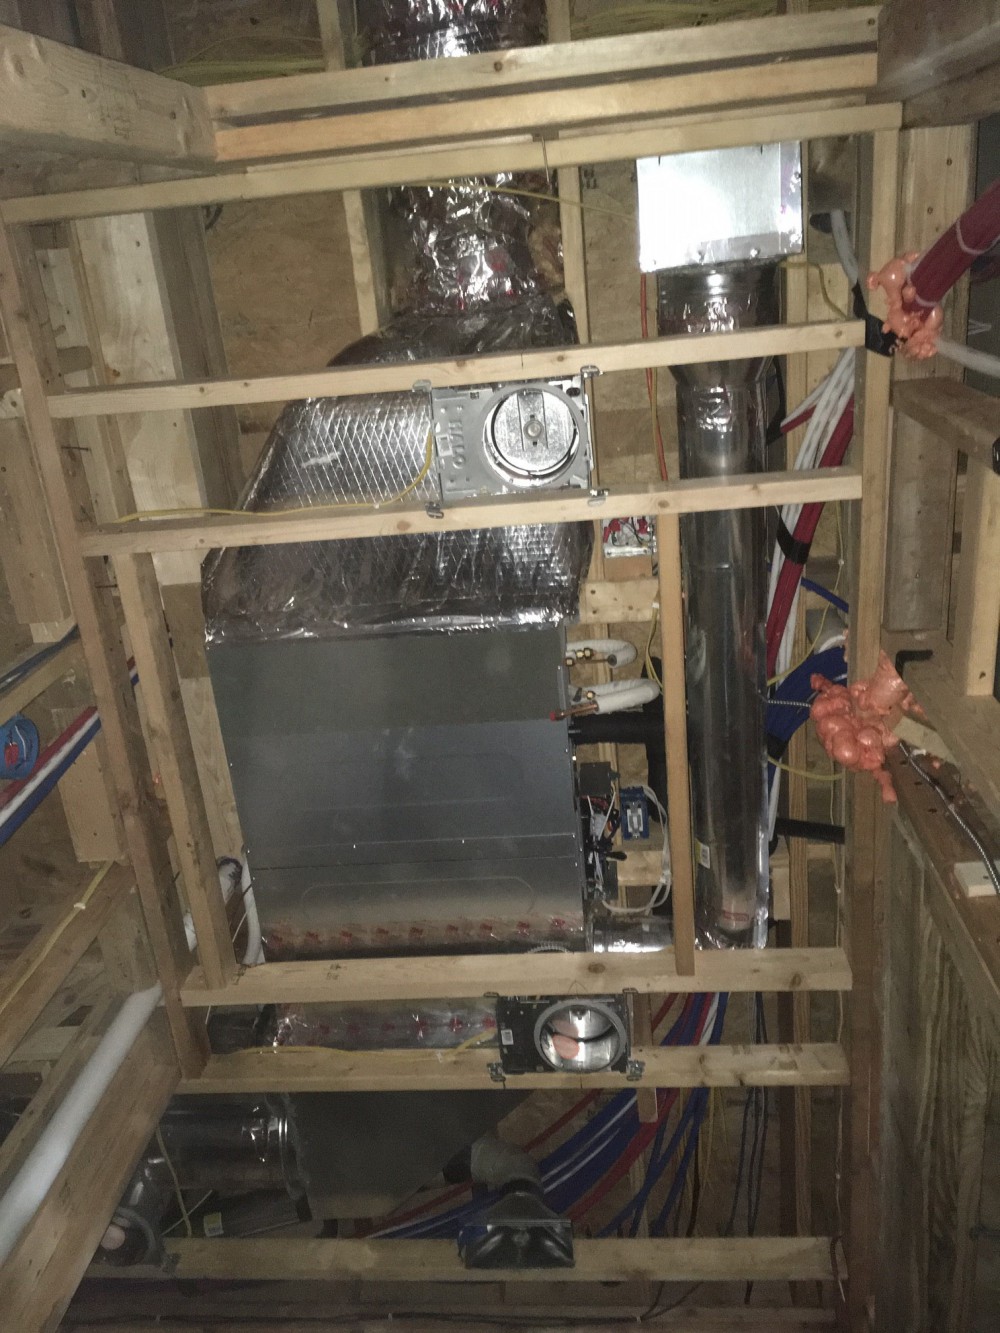
It’s hard to show our A/C system through photographs, since everything is so spread out. This picture is a view of the ducting in the ceiling cavity of the first floor bathroom.
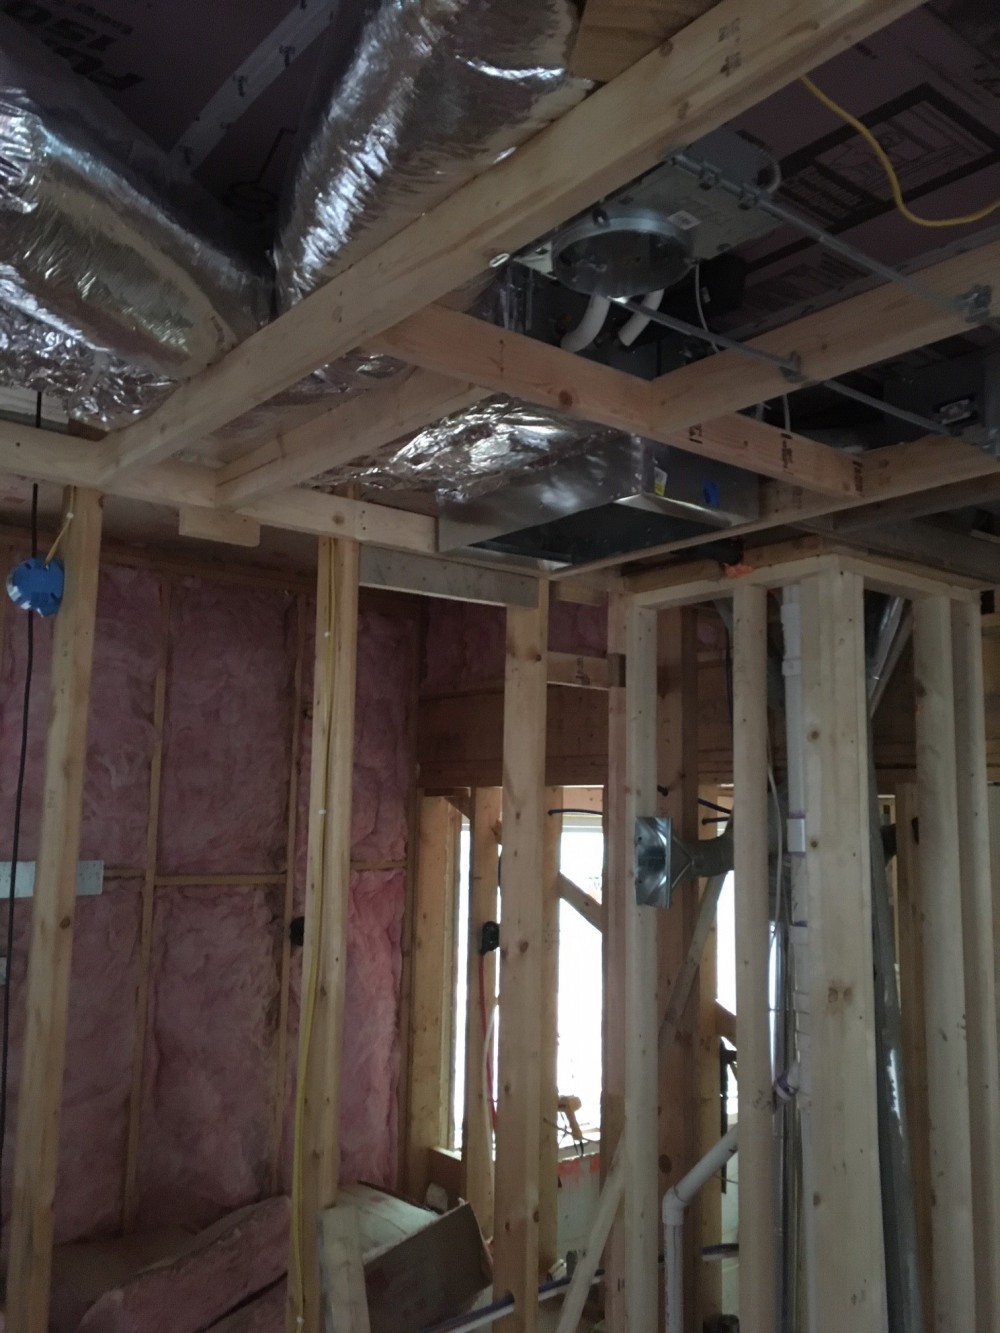
We added a drop ceiling and took out a corner of our master closet in order to run ducting.
Since we didn’t design our house to allow for easy ducting, John had to get creative in how to make things work. He used a CAD modeling tool to design intricate ducting units that could fit into specific spaces. The tool would deconstruct the model onto a 2D plane, making it possible to build each one from a single sheet of metal.
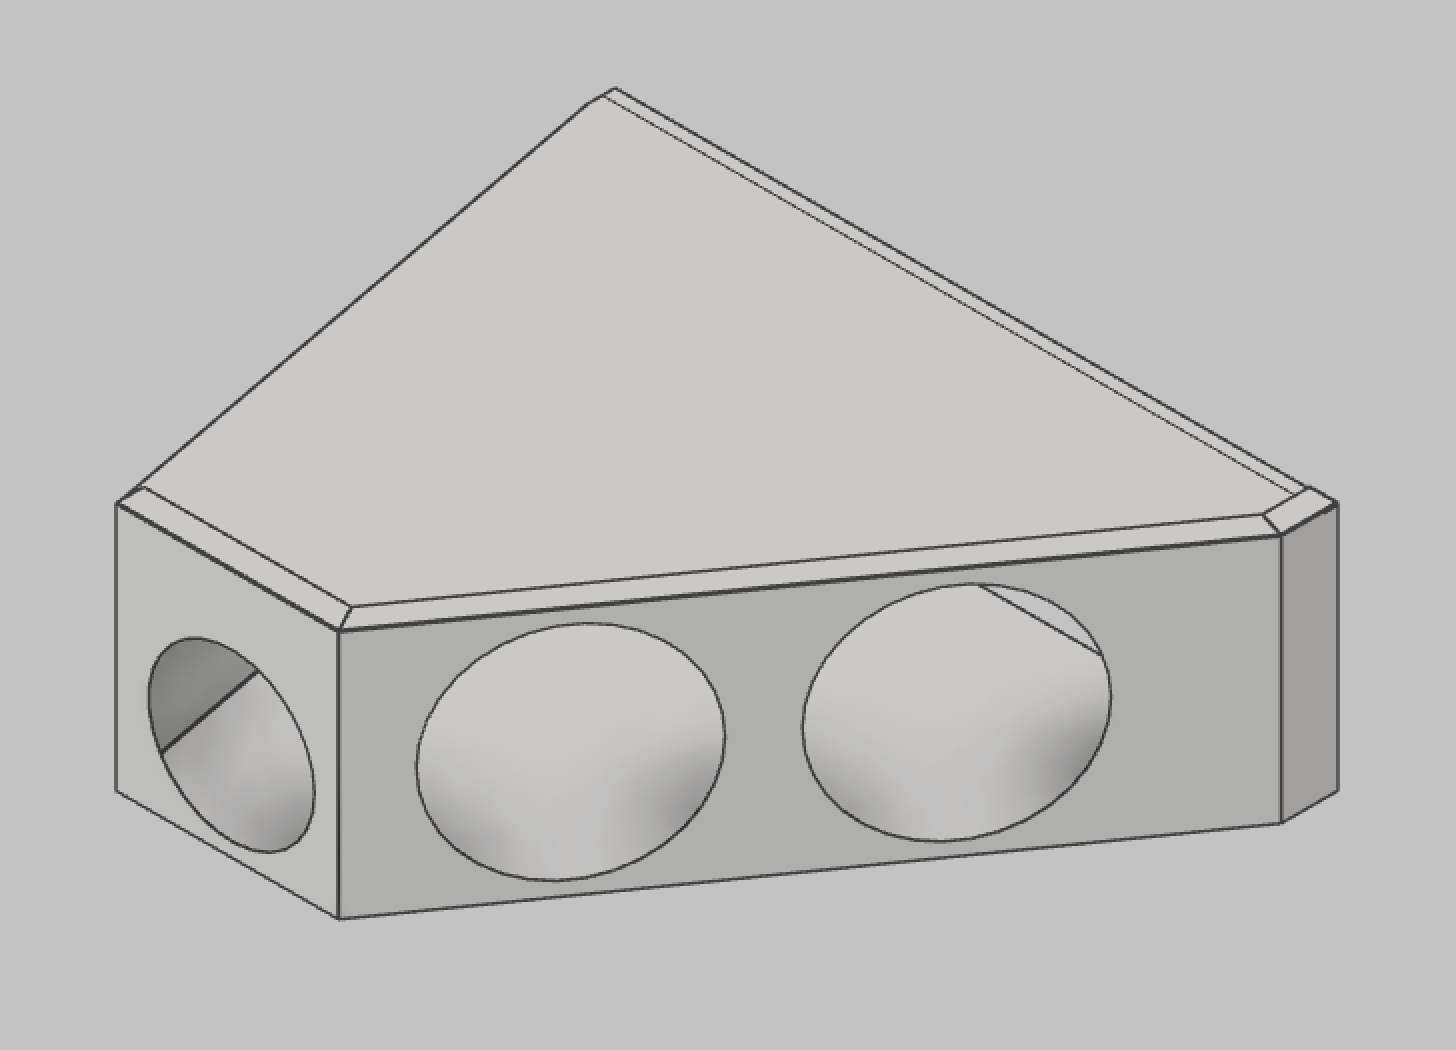
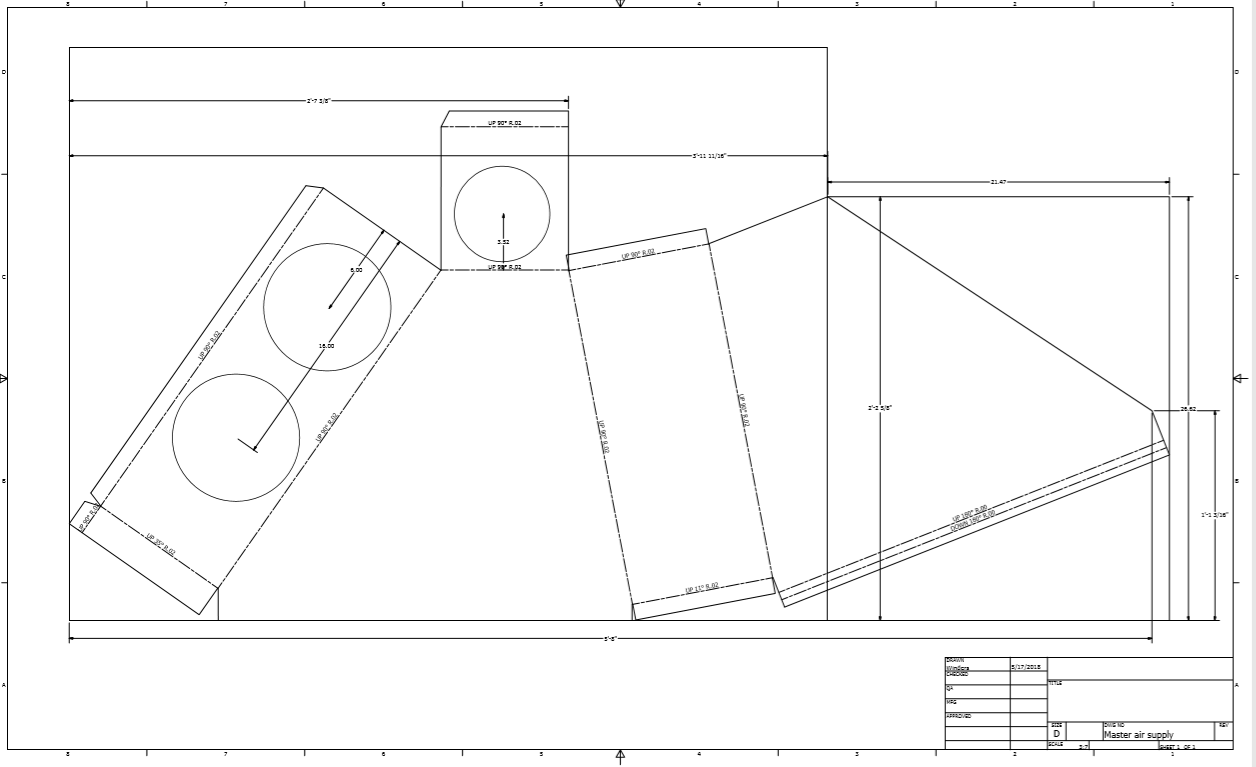
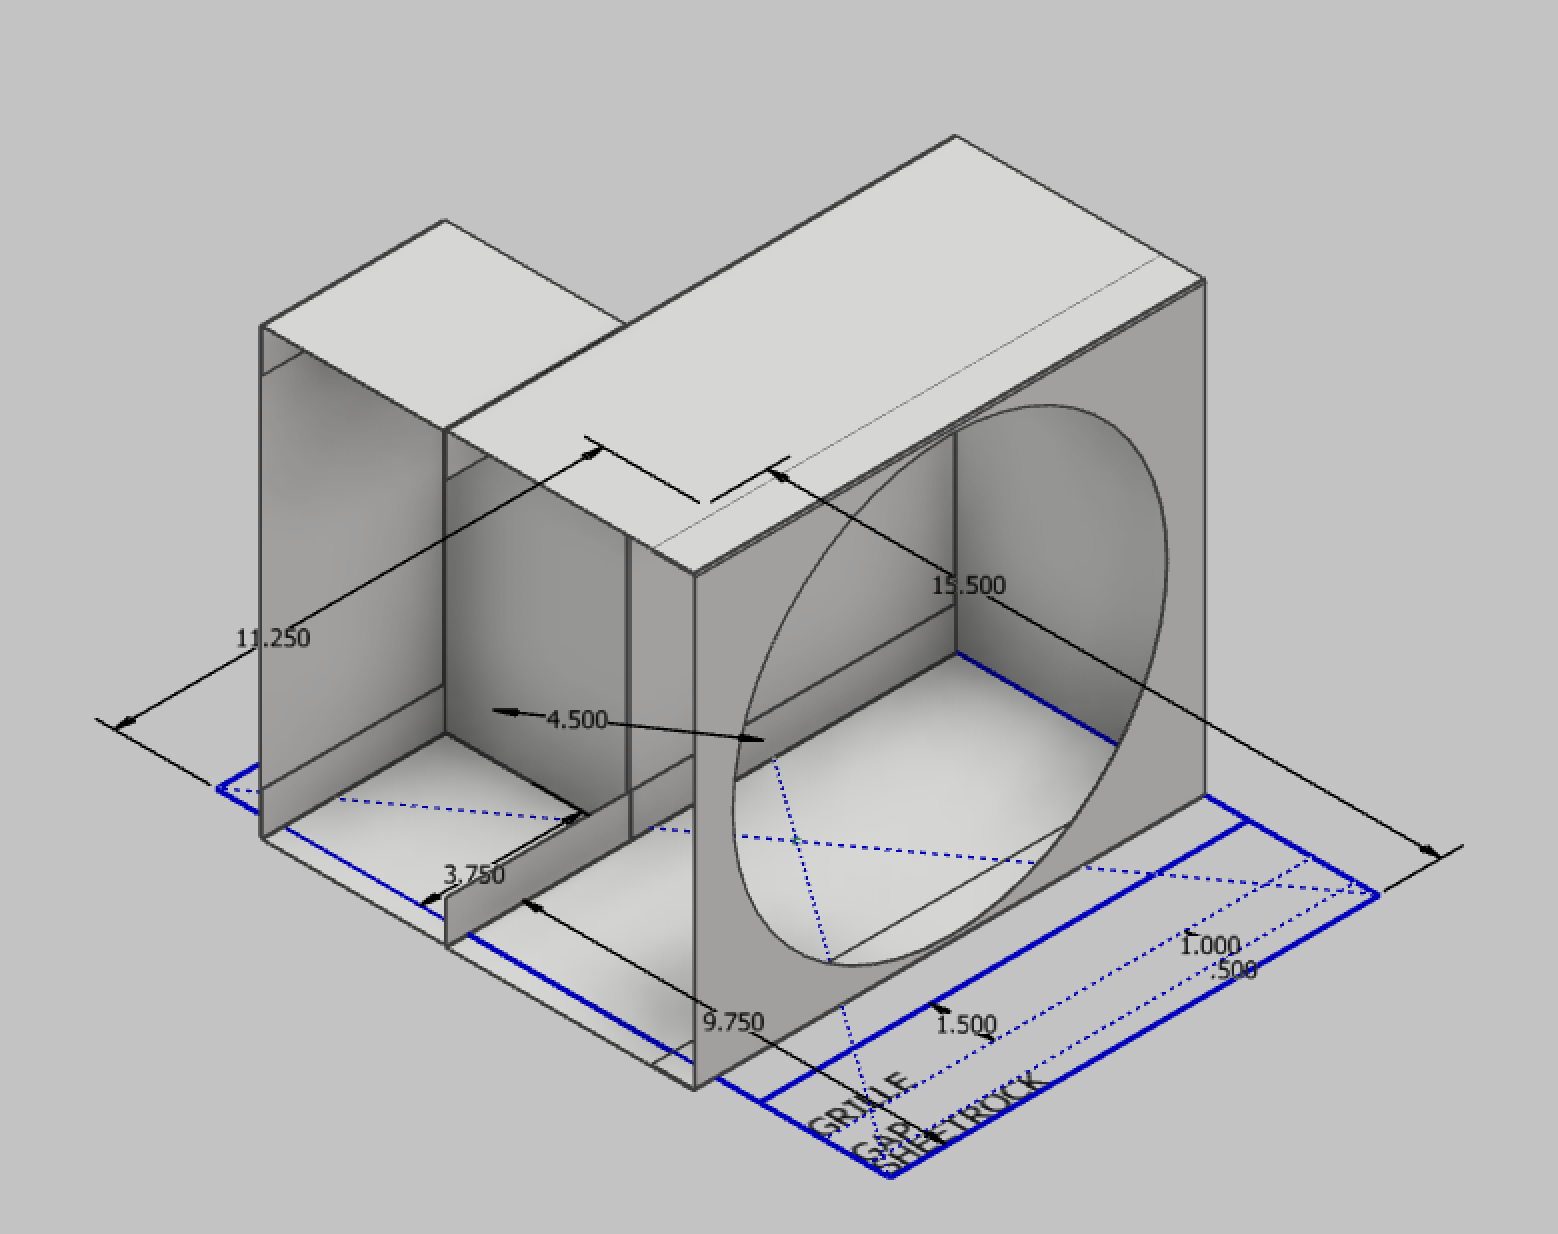
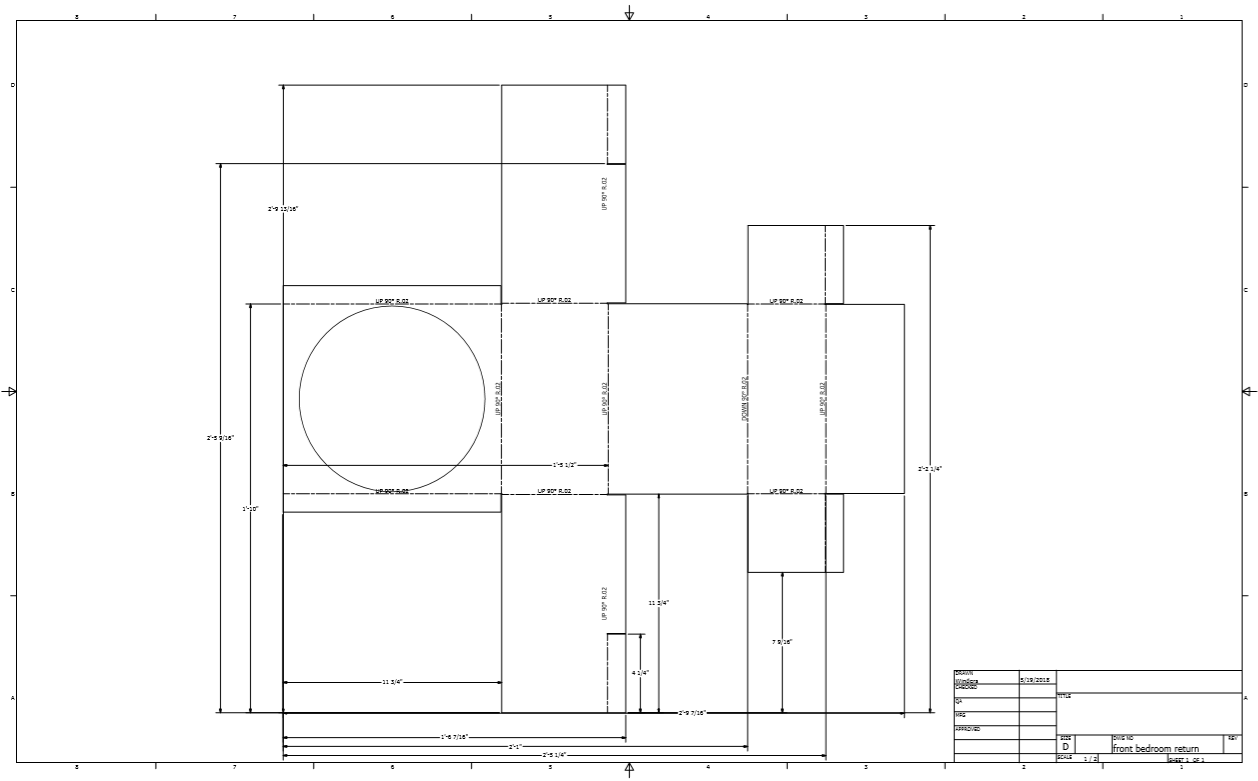
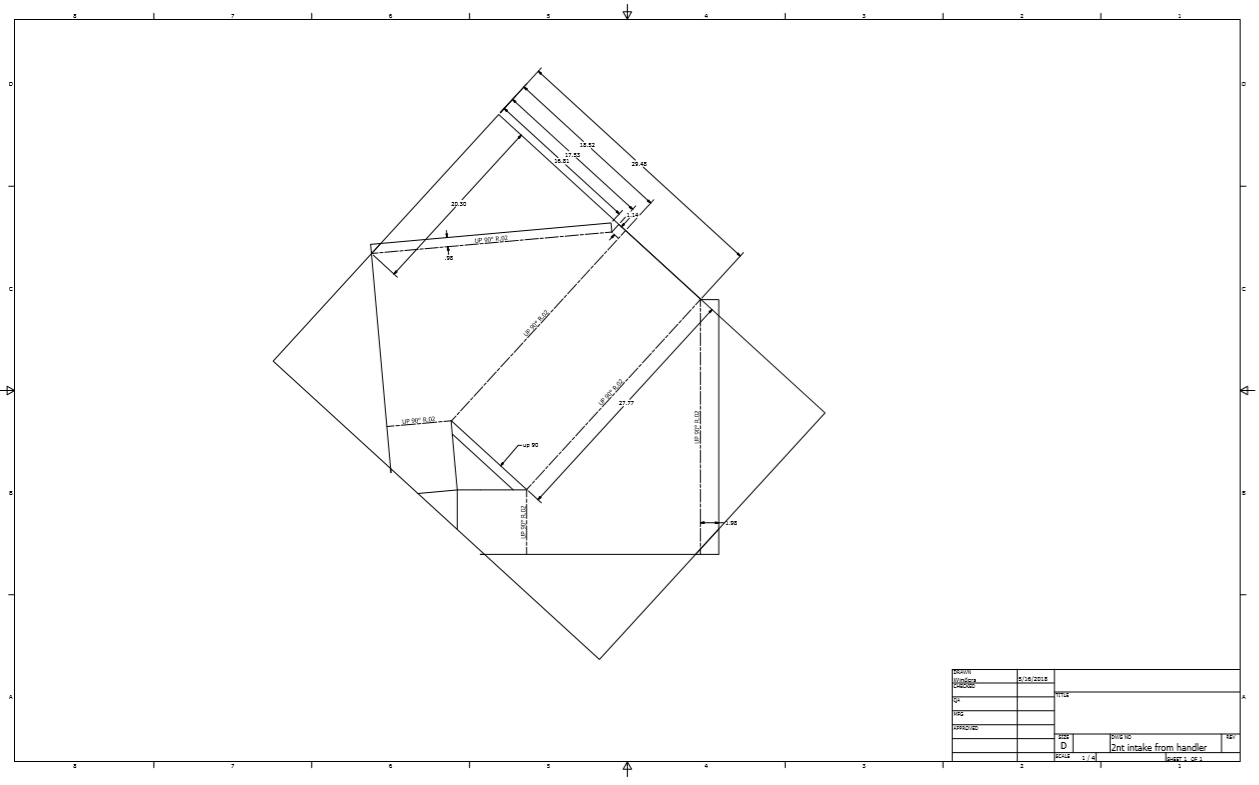
Just very impressive work with using CAD to design solutions that fit into your design. Rather then compromising on your design to fit.