Throughout this home-building process, we have toiled knee deep through mud, carried hundreds of boards and planks up our steep driveway, and embarked on numerous projects – such as the stem walls – that we never want to do again. The roof, however, was the first element where we seriously considered giving up early on and hiring help. Unfortunately, since we were installing a standing seam metal roof with the number of special joints (valleys, ridges, rake edges, etc), the estimation for installation alone was around $28,000! So, we sucked it up and did it ourselves.
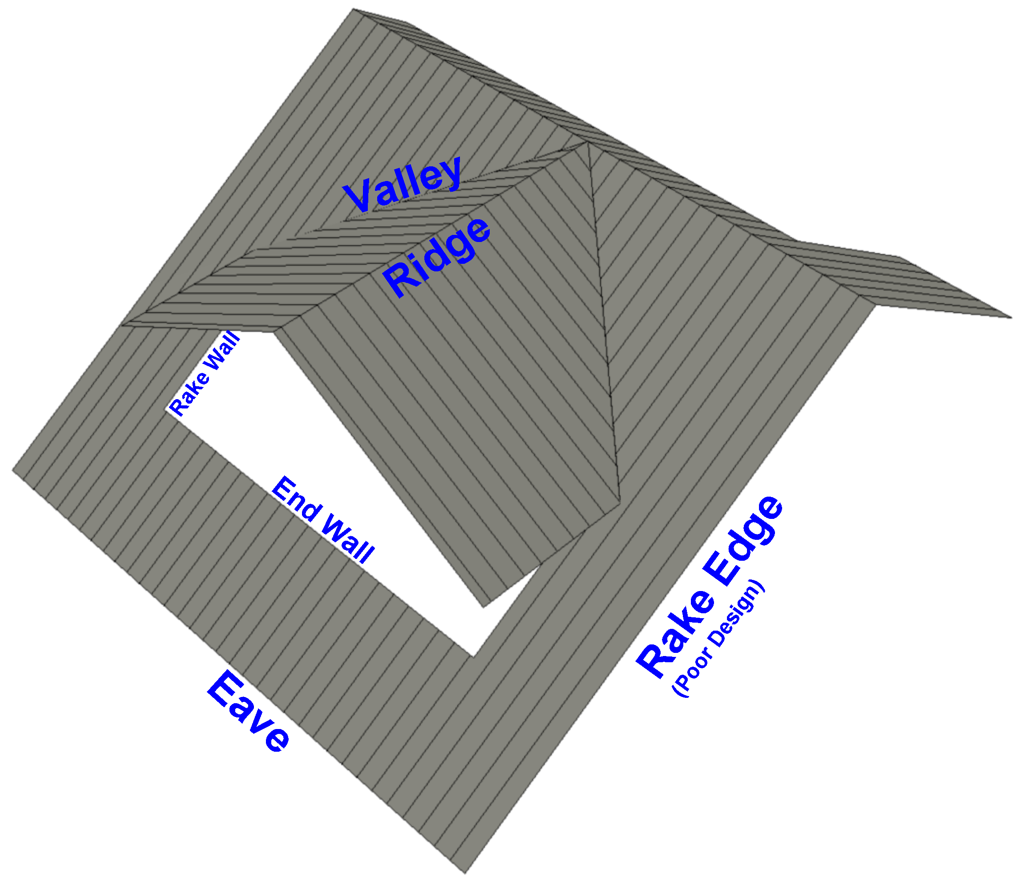
A model of our roof, with the different components labeled. Also, the lines depicting the panel breakdown is to scale, giving an idea of how many pieces we had to install.
To give a general idea of what we’ve been up to, I’ll try to simplify an incredibly complicated process. For starters, each individual panel had to be cut and folded to fit. The panels that go straight from top to bottom are the easiest, but still require numerous cuts and folds before being hooked into the eave trim (which also needs to be installed along the bottom). It gets more complicated when two angled roof portions meet in a valley. And of course there are also ridges, endwall and rakewall flashings, and eaves to deal with.
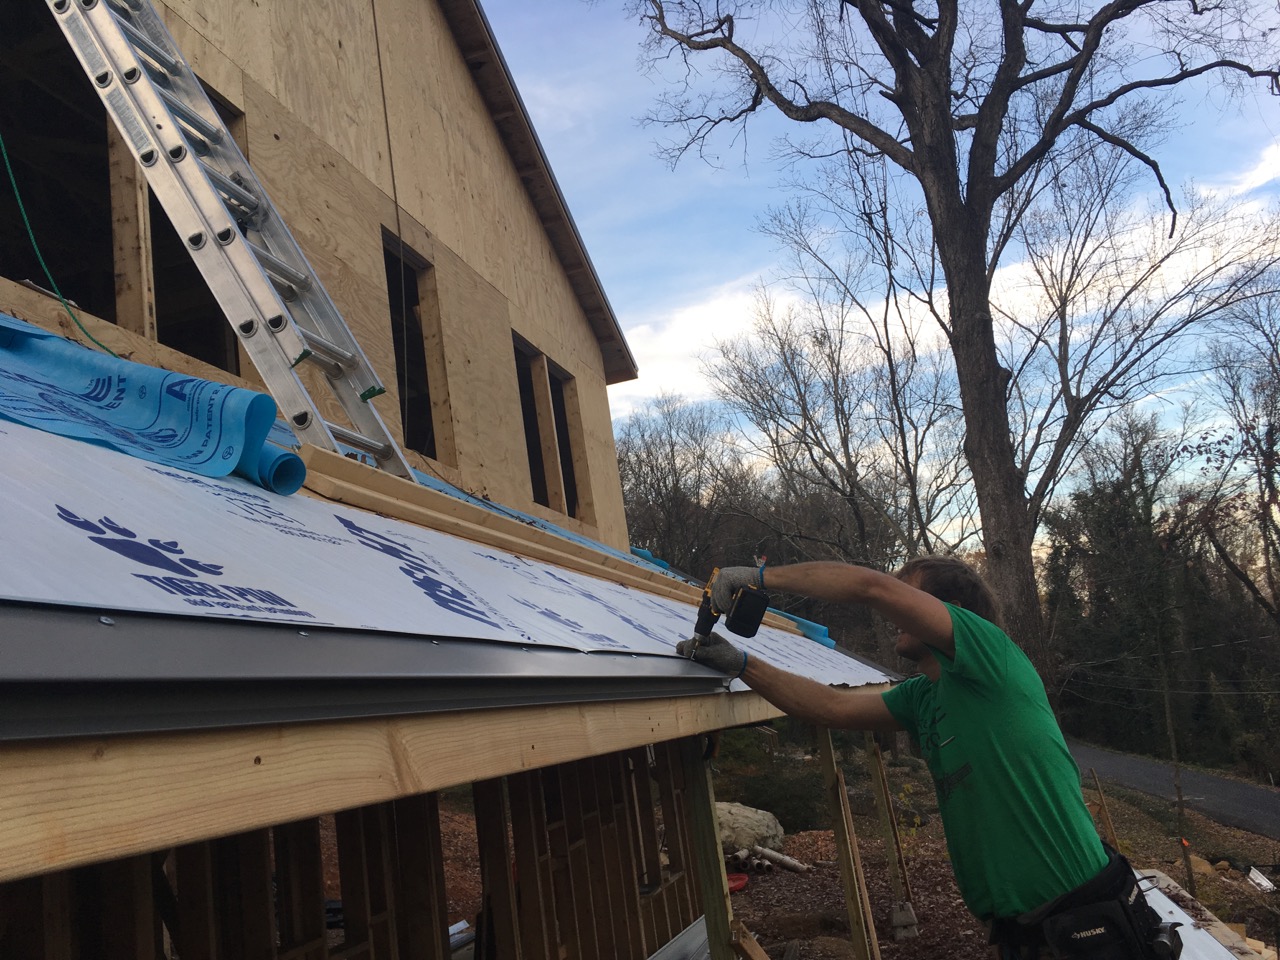
Installing the eave trim that each panel hooks into
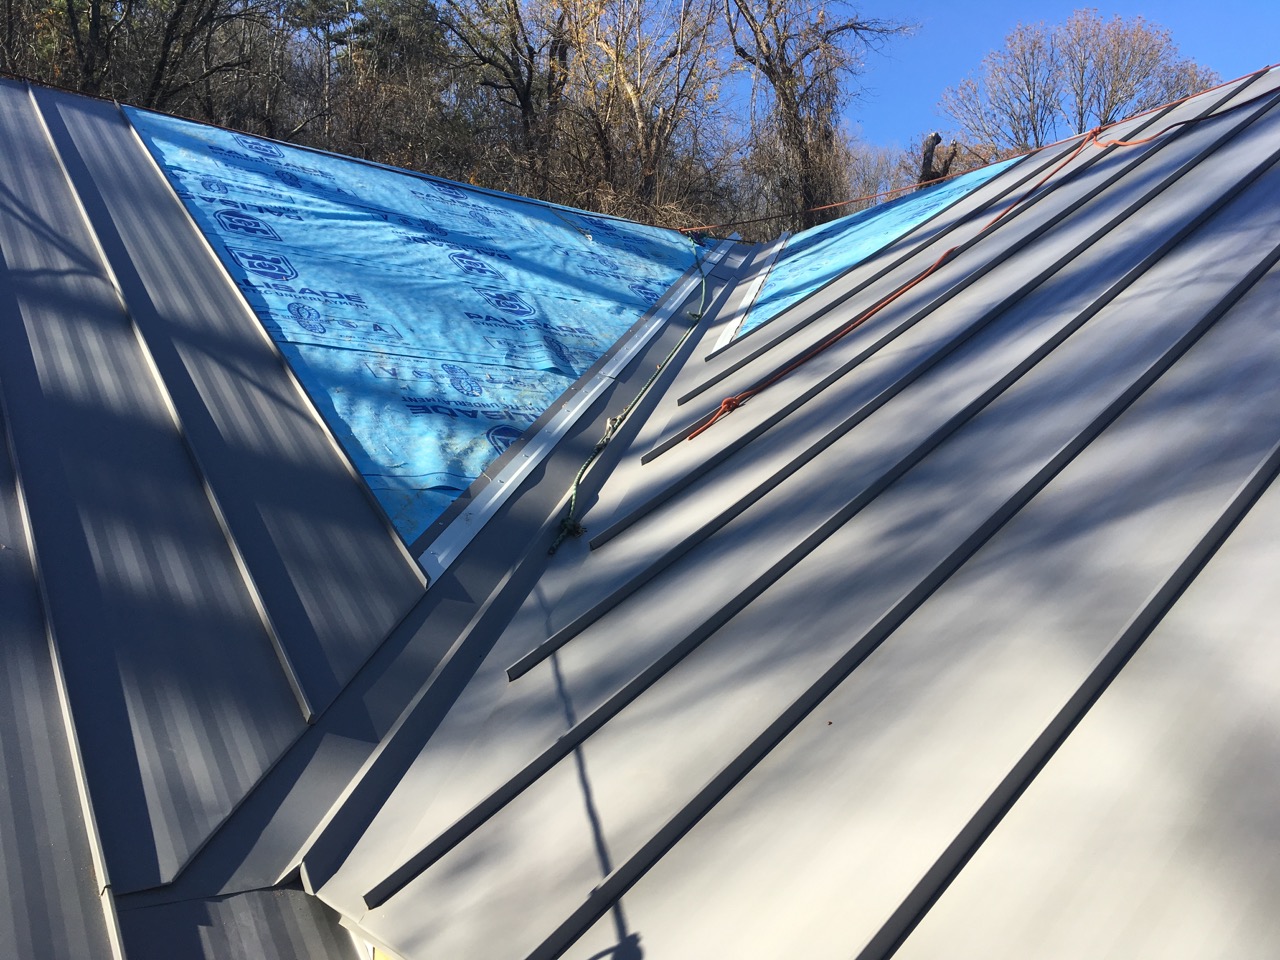
The panels on the main roof and the dormer, working their way up the valley where they meet
But nothing was worse than the rake edges, of which our roof has way too many. Each one first required a z-channel to be attached via butyl tape and screws. Over the edge, we then needed to attach a cleat for the rake to hook into. The rake edge is then hooked into the cleat and secured via rivets in the z-channel. This is complicated enough without adding the fact of extremely poor design; the cleat only stuck out about half an inch, so there was very little room for leeway. Our roof bowed in places, so the cleat had to track the edge perfectly despite the fact that the rigid metal was difficult to bend. Single pieces would take the three of us hours to install while we dangled in uncomfortable positions, cursing because there was inevitably one spot that wouldn’t stay hooked.

A diagram showing the different components in a rake edge installation
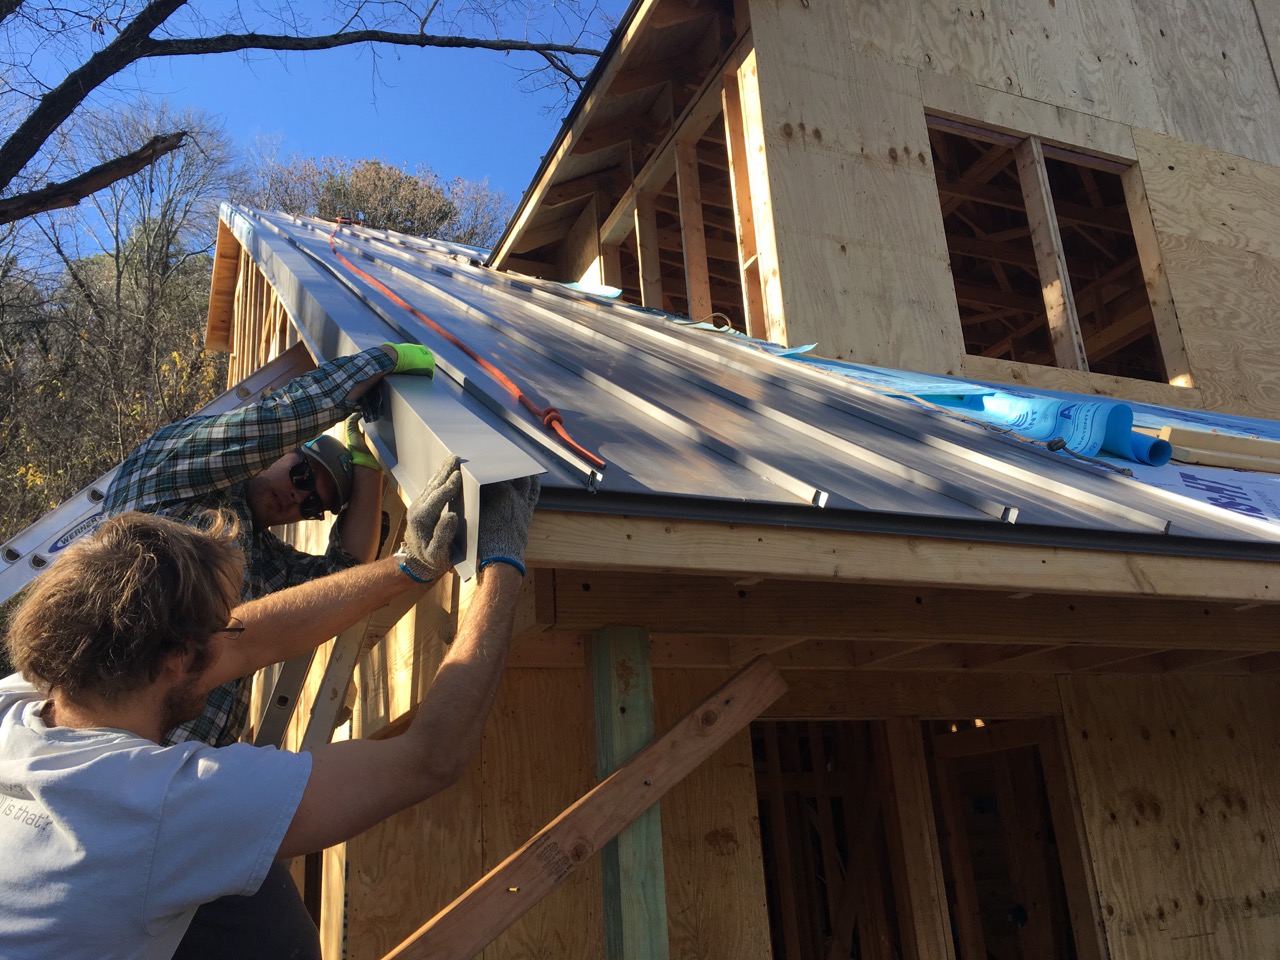
Installing the dreaded rake edge. It got harder when we were attaching pieces that were too far off the ground to reach from a ladder.
Another fun challenge involved trying to maneuver the 40 foot long panels into position. The three of us would simultaneously climb ladders placed on the back porch while trying not to bend the flexible panel. One at a time, we would shift into harnesses on the roof peak. Then I would walk down the face of the roof, John would walk down the valley, and Reid would traverse along the peak… all while holding the panel as straight as possible. Of course, after moving half the panels onto the roof, we realized we had them facing the wrong way and had to reverse the whole process and do it again.
As if all of these hassles weren’t enough of a deterrent, the worst part of the process was the ongoing discomfort. We spent most of our time in climbing harnesses while constantly leaning forward to drill or hold panels in place. There were days we could barely walk because our backs hurt so much, and our skin was raw and bruised from the harnesses. Each morning, it took some serious mental resolve just to put the harness back on (and put a serious damper on our desire to do any rock climbing).
We’re finally putting the finishing touches on the roof, and I can only hope that it’s a long, long time before we ever have to deal with it again.
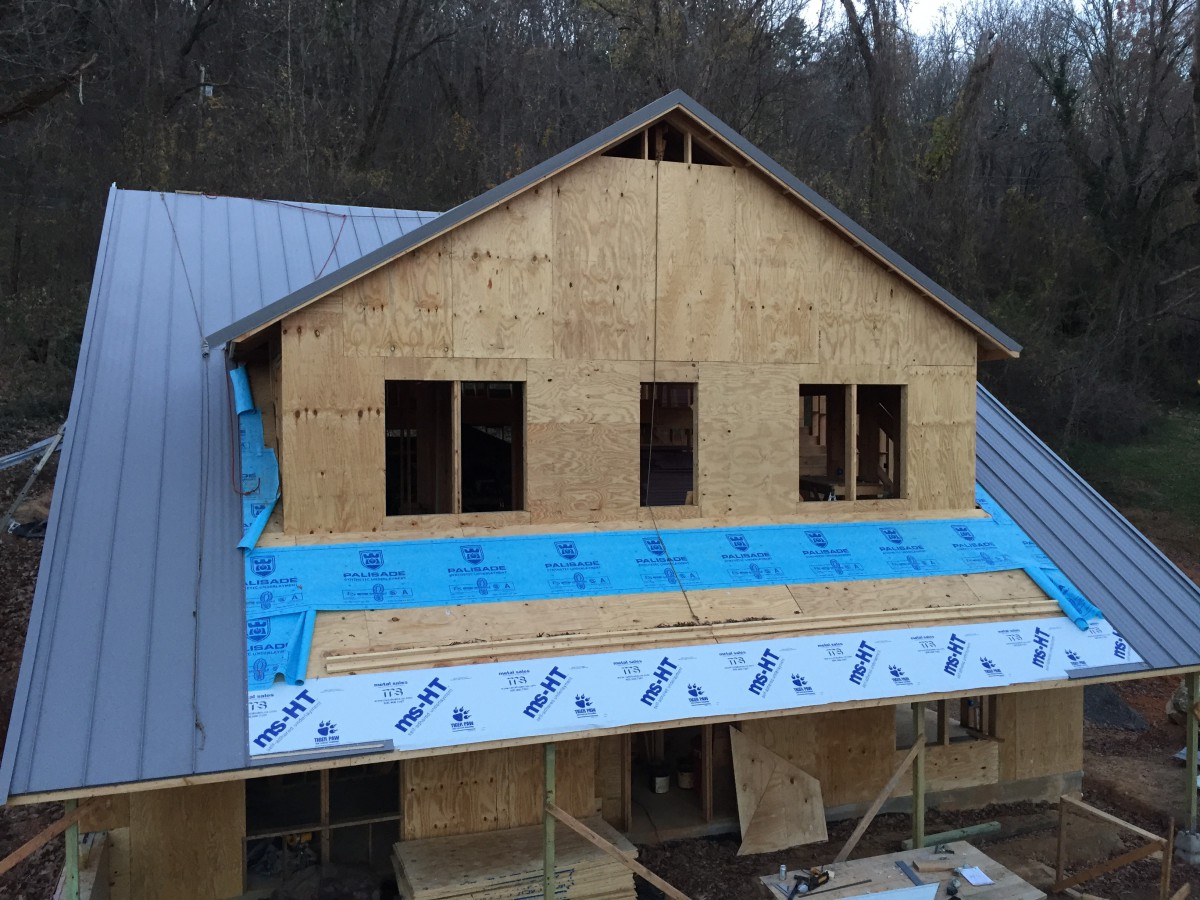
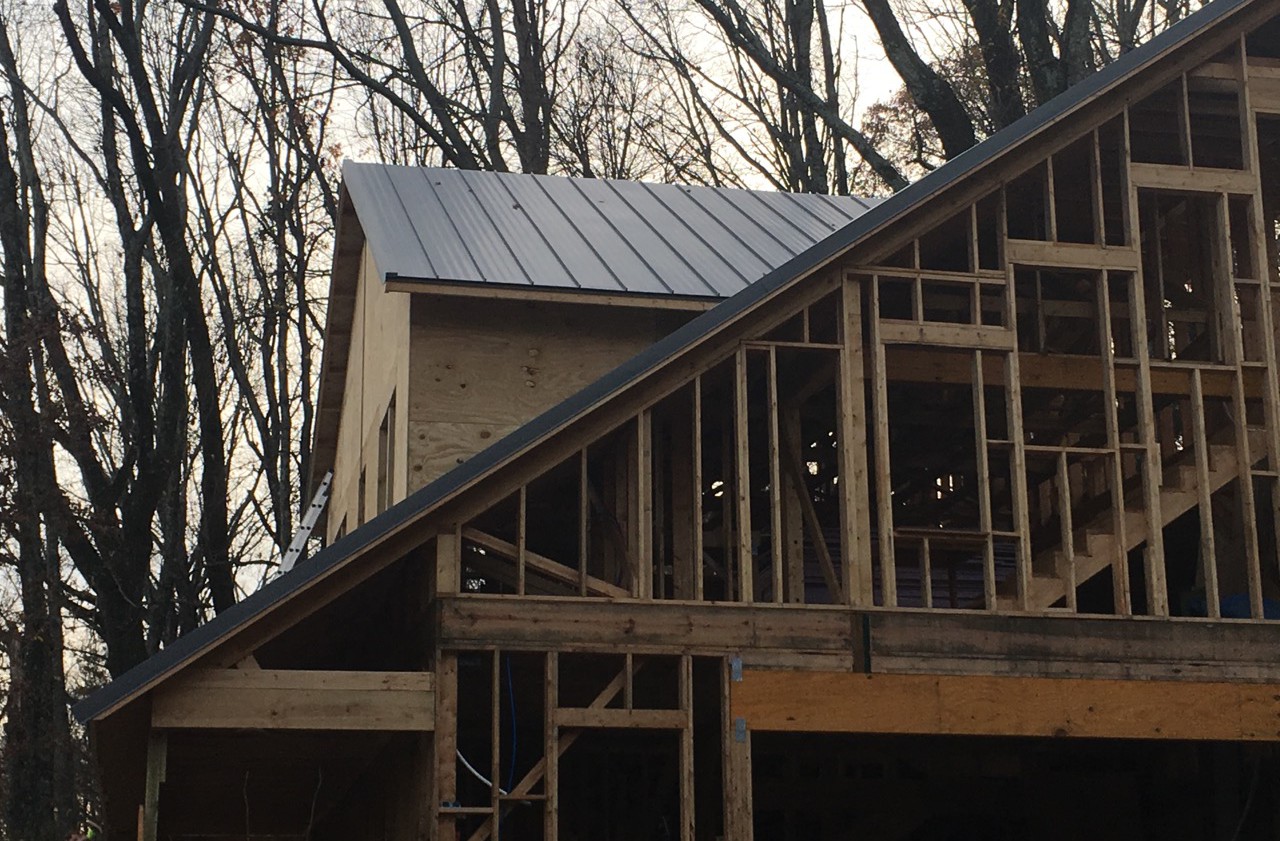
The front view of the house. We chose not to roof the front porch until we finish sheathing the dormer, since it’s difficult to access that part of the house from the ground.

A mess of ropes that all connected at the top of our roof
This metal roofing post was very interesting to read. It’s always so difficult to learn something new while doing it!! (You know what I mean…) Looks like you did a great job. That roof should last more than 50 years- so I doubt you will be back up there when you’re in your 80’s!! (Well maybe…) I’m sure this cold weather has made it challenging also. What’s next? Windows and siding? Thanks again for the update. Blessings and health to you in 2018! Tom
It sounds like massages are in store! March!!! Love to you.