
When building a house, all my favorite tasks are the ones where you finish a hard day’s work and can look back at all the progress you made. There have been weeks where we are working every day on tedious tasks – such as wiring, blocking, or insulation – with very little to show for it afterwards. Thankfully, installing drywall is one of the fun tasks. It goes quickly, and you can look at the work you’ve done and see the rooms taking shape!
Installing drywall is also the process that got us the most skepticism from people around us. Everyone was asking why we weren’t hiring people for such a basic and affordable task. The simple answer is that we simply don’t trust subcontractors to do work as well as we – or more specifically, my perfectionist husband – would like. Additionally, we have continually struggled to find people to do work for us; Chattanooga is in a massive development boom, so without the offer of continuing work – like what a contractor or big company provides – people don’t want to work with us. Most of the time we get flat out refusals or extremely high quotes. That being said, we did decide to hire out the finishing work (mudding, taping, floating, corner beads, etc). We’ve heard it’s the easiest way to ruin a house, and it doesn’t cost much to hire experienced drywall finishers. They started today, so fingers crossed that we don’t regret it.
One of our biggest takeaways – yet again – is that using the right tool makes all the difference. Fortunately, this time we had almost all the right stuff from the get-go:
- Light cutting tools: We have more than 70 recessed lights and more than 80 outlets in our house. Being completely clueless about the process, I initially thought that we would have to precisely measure out and cut holes for each of their locations prior to putting a board in place. Considering that our lights only have about a quarter inch of leeway on each side, this seemed daunting and ripe for error. Instead, we used a tool that allowed us to cut the holes after mounting the boards. In addition, we didn’t even have to pre-mark the approximate locations because we used a simple but brilliant system of magnets. One end screws into the light fixture or outlet, and the other end is able to attach to the magnet through the board.

The tool we used to cut out pieces of drywall (outlets, lights, doors, windows, vents, etc) after mounting the board in place
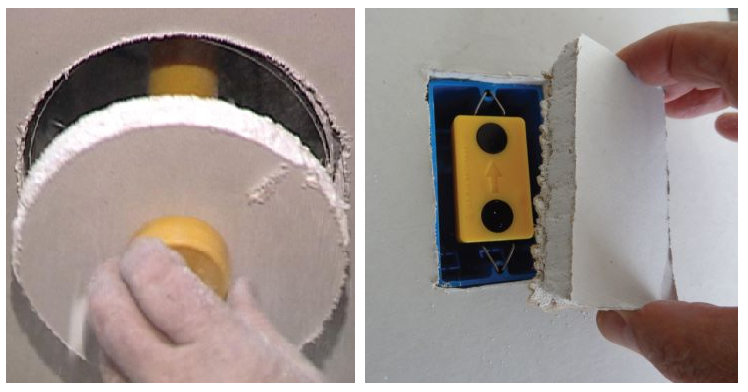
The simple – but incredibly useful tool – that uses magnets to find the center of lights and outlets without having to mark them in advance
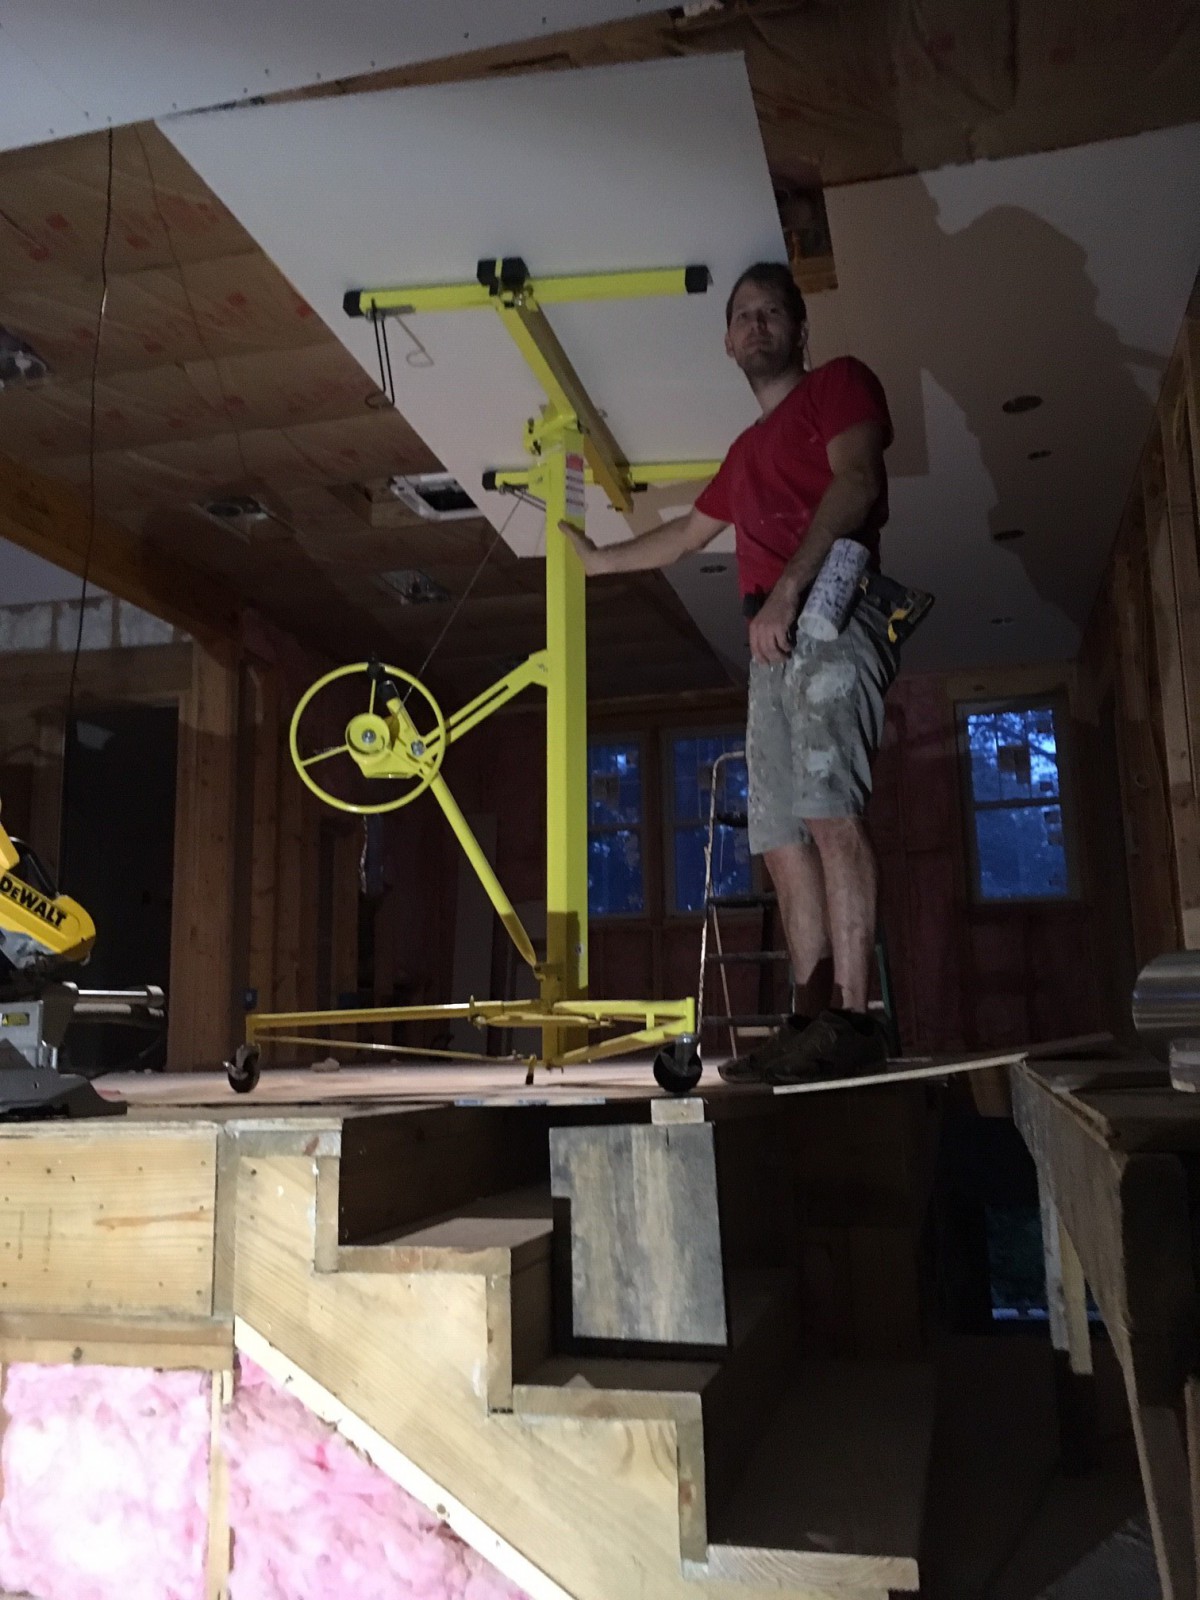
- Drywall Lift: On the ceiling, we used 5/8 inch drywall pieces up to 12 feet long. Weighing in at over 100 pounds a sheet, there was no way we were going to manually hold the piece above our heads while trying to screw it in place. Instead, we purchased a drywall lift that allowed us to set the sheet on it and crank it up into position.
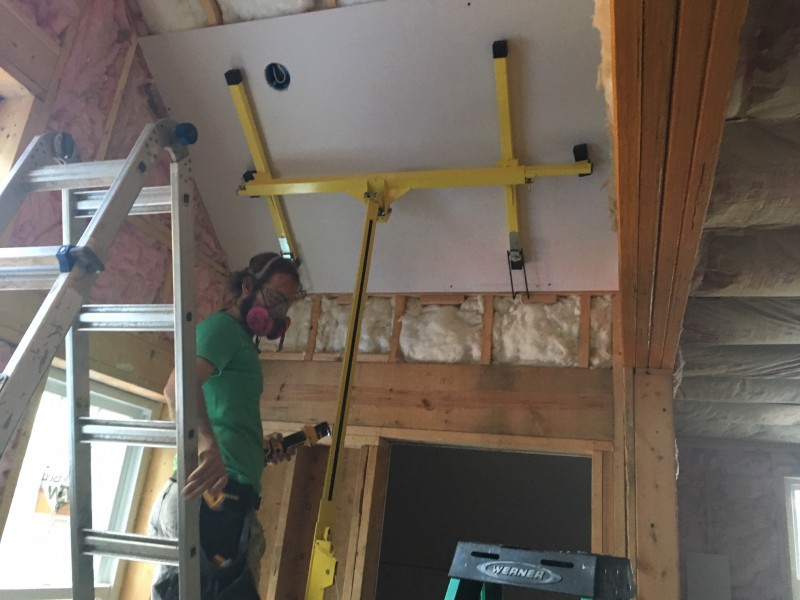
Using the drywall lift to hang ceiling pieces at an angle on our cathedral ceiling. We couldn’t set the list on the stairs, so we had to remove the base and balance it on a single step.

We created some creative – and moderately unstable – supports to use the drywall lift above staircases.
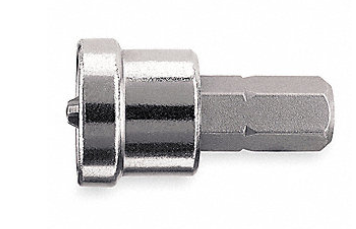
- Drywall Screw Setters: When screwing drywall pieces into place, it’s important to drive the screws in far enough that they don’t stick out. However, if you go too far, they pierce the paper that is necessary to hold them in place. The sweet spot is tiny and takes finesse to hit. After a few days of tedious screwing, we bought a few tips made specifically for drywall. They control the depth, making the job a lot easier and more efficient.
- John’s Personal Lever System: When hanging wall pieces, we always wanted to position them tightly against the ceiling pieces. Instead of trying to hold it in place, John developed a lever system. We attached two wooden levers just below where each board would be hung, then simply set the board on top and cranked it into position. We haven’t seen anyone else using this technique, but it was incredibly effective.
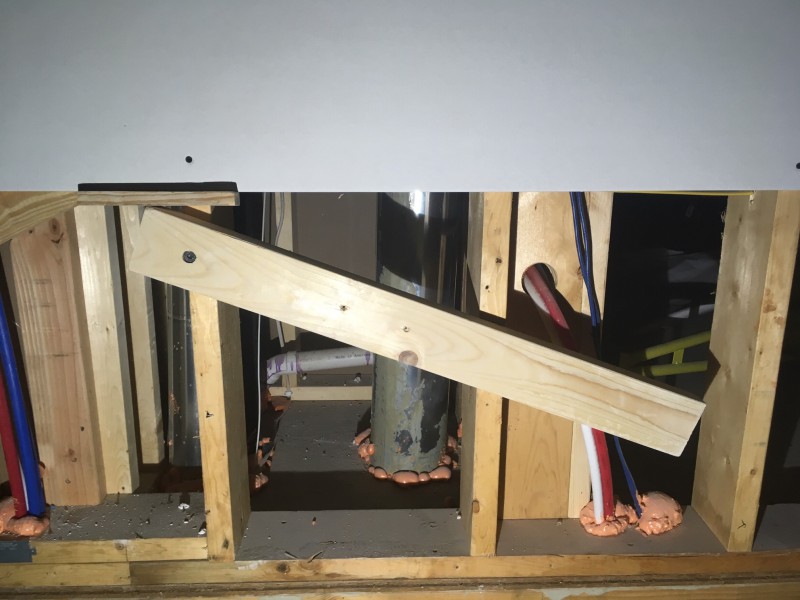
A view of the lever system John came up with. We simply set the board on top and then pulled down on the lever to push the sheet into place.


The one really frustrating part of hanging drywall – besides the blisters I got from single-handedly attaching around 75 pounds of screws – was that every time a wall or window was even slightly angled, a lot of effort was required to make everything look straight. We had one wall where all the vertical framing pieces bowed in one direction except one, which bowed the opposite way. The difference was obvious and needed a lot of shimming. Doing drywall returns around the window was another challenge, since I quickly discovered that not a single window was completely parallel to the framing boards around it. Shimming each side ended up taking more than an hour per window.
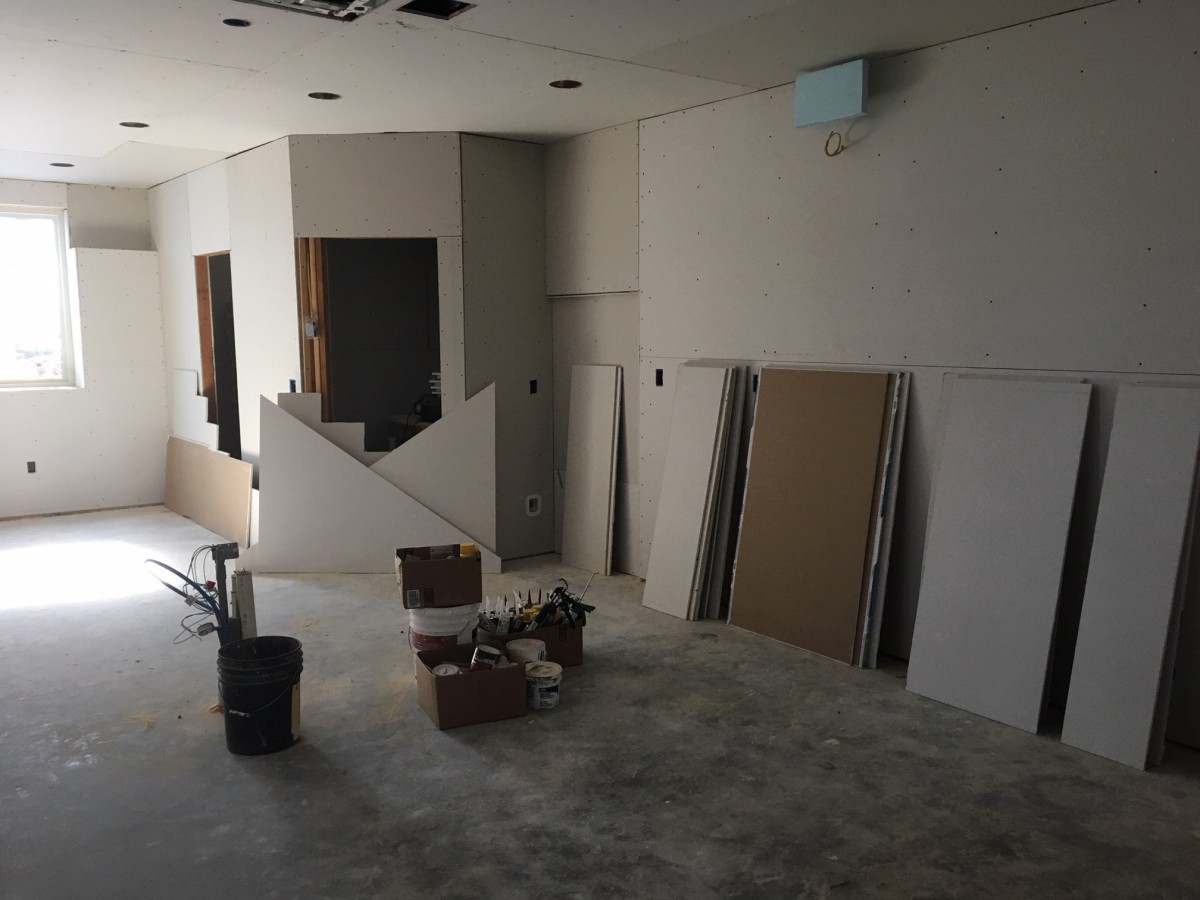
To date, most of the photos I have included in this blog have either been of the exterior or of specific components inside the house. Now that there are interior walls, it seems like the perfect time to give a photo tour of our main floor:
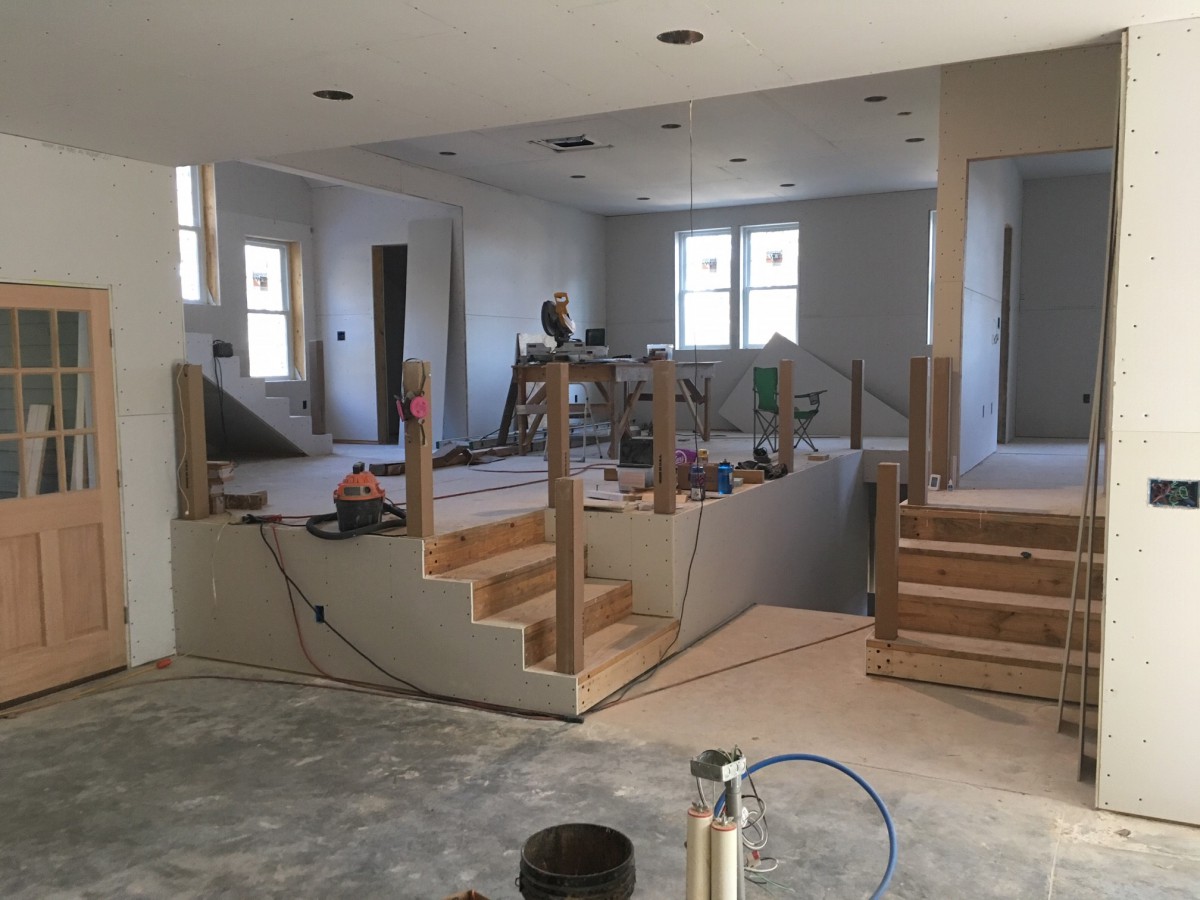
A view of the living room (and the doorway to the master bedroom) from the kitchen

A view of the kitchen while standing in the dining room
Standing in the kitchen, looking at the dining room, pantry, and half bath.
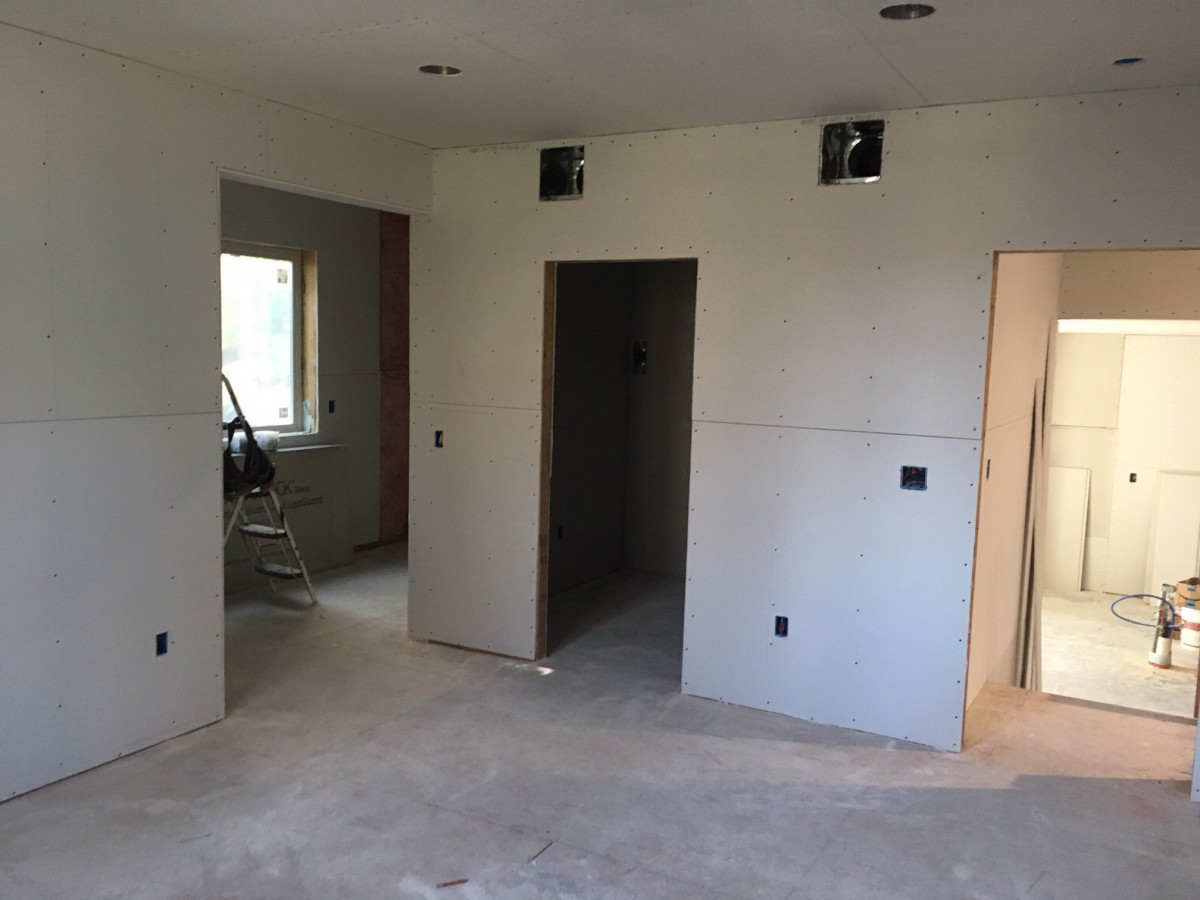
The inside of the master bedroom

Our two car (or four Honda insight) garage
Leave a Reply